Showing posts with label staining. Show all posts

Sunday, October 11, 2015

Re-Staining the Cedar Shingles and Waxing ADU Poetic

I had heard that cedar shingles needed be restained every couple years. A couple months ago, I looked back and realized it's been four years since we finished building the ADU. Whoops.

The stain had started to look tired; the siding needed a makeover. The shingles had lost some of their waterproofing capability and the portions of the structure that experience direct sunlight had started to visually deteriorate. Cedar shingle siding can last as little as 10 years if not maintained, and 40 years or more if it is.

Thursday, February 27, 2014

Refinishing the Concrete Floors

Finishing up the ADU construction in the summer of 2011, my partner and I were attempting to make tens of good, long-term design decisions about the final look and feel of the ADU. From the placement of outlets, to the colors and style of granite countertops in the kitchen, to how to build attractive built-in cabinetry in the bedroom cheaply, there was so much to figure out quickly.

Having never worked with concrete, I was at a loss about how to correctly finish the concrete. I went to Home Depot and found a concrete stain and was able to easily apply a beautiful, rich red stain to the floor with a roller brush. Then, I applied a sealant, and voila, within a matter of hours, the drab grey concrete was a glossy red. It looked awesome.


Fast forward 2 years, 6 months, and I was no longer so psyched about the wonderful looking concrete floor. Over time, the stain gradually wore off to the point where it diminished the aesthetic of the ADU. It was a cool process to observe where it wore off . Any guesses where the it came off quickest? Answer: The kitchen- where we apparently spend the most the time walking around.


At first, there were just little white nicks, but eventually, the concrete looked ragged. I was frustrated because I'd stained and sealed the floor, but I came to learn that the product that I'd used wasn't really an absorbent stain; it acted more like a paint. And, like paint, it eventually peeled off. 

In January, I decided to bite the bullet and re-do the floor altogether. I researched options on how to refinish concrete floors, and eventually learned that the only viable approach to getting a good finish on the concrete floors would be grind down the existing surface. Then, we would have to re-stain the concrete with an acetone mixture that would actually penetrate the surface and stain the top 1/8" of concrete. 

The process included grinding down the existing concrete with a 4 grit, 8 grit, 16 grit, 32 grit, 64 grit, all the way to an 800 grit, to give it a polished finish. The stain/acetone mixture was sprayed onto the floor into the final passes. This concrete staining process is referred to as acid-etching. Lastly, a very thin protective was layer was applied. 

To prep for this job, we had to move everything off the ground floor of the ADU. Then, we took off on a road trip for the long weekend, and let professional concrete contractors work their magic. A big part of their job was taping off the entire first floor so that the concrete dust wouldn't cover everything. They were extremely thorough, nonetheless, concrete dust still managed to seep through and coat some of the walls. 


Here are pictures of the process. They spent two long days re-doing the 500 sq ft concrete floor. When they were finished, the floors looked awesome, as shown below. Unlike the paint-like stain process I did initially 2.5 years ago, this new stain should remain looking glossy and rich for years and years to come. 


This job cost $2,500. It wasn't cheap. I asked the contractor how much this job would have cost if I had hired him outright at the beginning. He said it would have cost the same amount, which surprised me. So, in the end, my initial stain job wasn't a mistake that ended up costing me more money. Rather, it simply required some additional work to move everything out of the house for the weekend. 

In hindsight, I would have sought and asked for a concrete foundation company that would have been willing and able to do all of the concrete work, down to the polished finish, and sought input on how best to get to the final glossy look that I was seeking initially. This would have allowed me to avoid the annoyance of refinishing the concrete floors. Like many building trades, concrete work has a lot of specialized processes, and I have found that having specialists scope out, advise, and in this case, execute the project, was critical to getting a final product that met my expectations. 

Wednesday, September 19, 2012

Finishing The Stairs

(Editor's note: I've authored a related post called Staircases in ADUs on AccessoryDwellings.org)

I'm authoring this post a year after we completed building and moving into the ADU. Dare I say, this is the last substantial construction project for my ADU.

Over the last year, Deb and I have slowly tackled various projects which I've described previous blog posts (the artistic sound barrier, the artistic handrail, landscaping and more). But, as any homeowner knows, it seems as though the work is never done. Once we moved in, it was easy to let the final stair riser tiling project slip off our immediate calendar.

With the ADU being on the upcoming Build It Green tour on Saturday, September 22nd, we motivated ourselves to put the finishing touch on the stair case (the end of this post includes several ADU related announcements which may be of interest to readers).

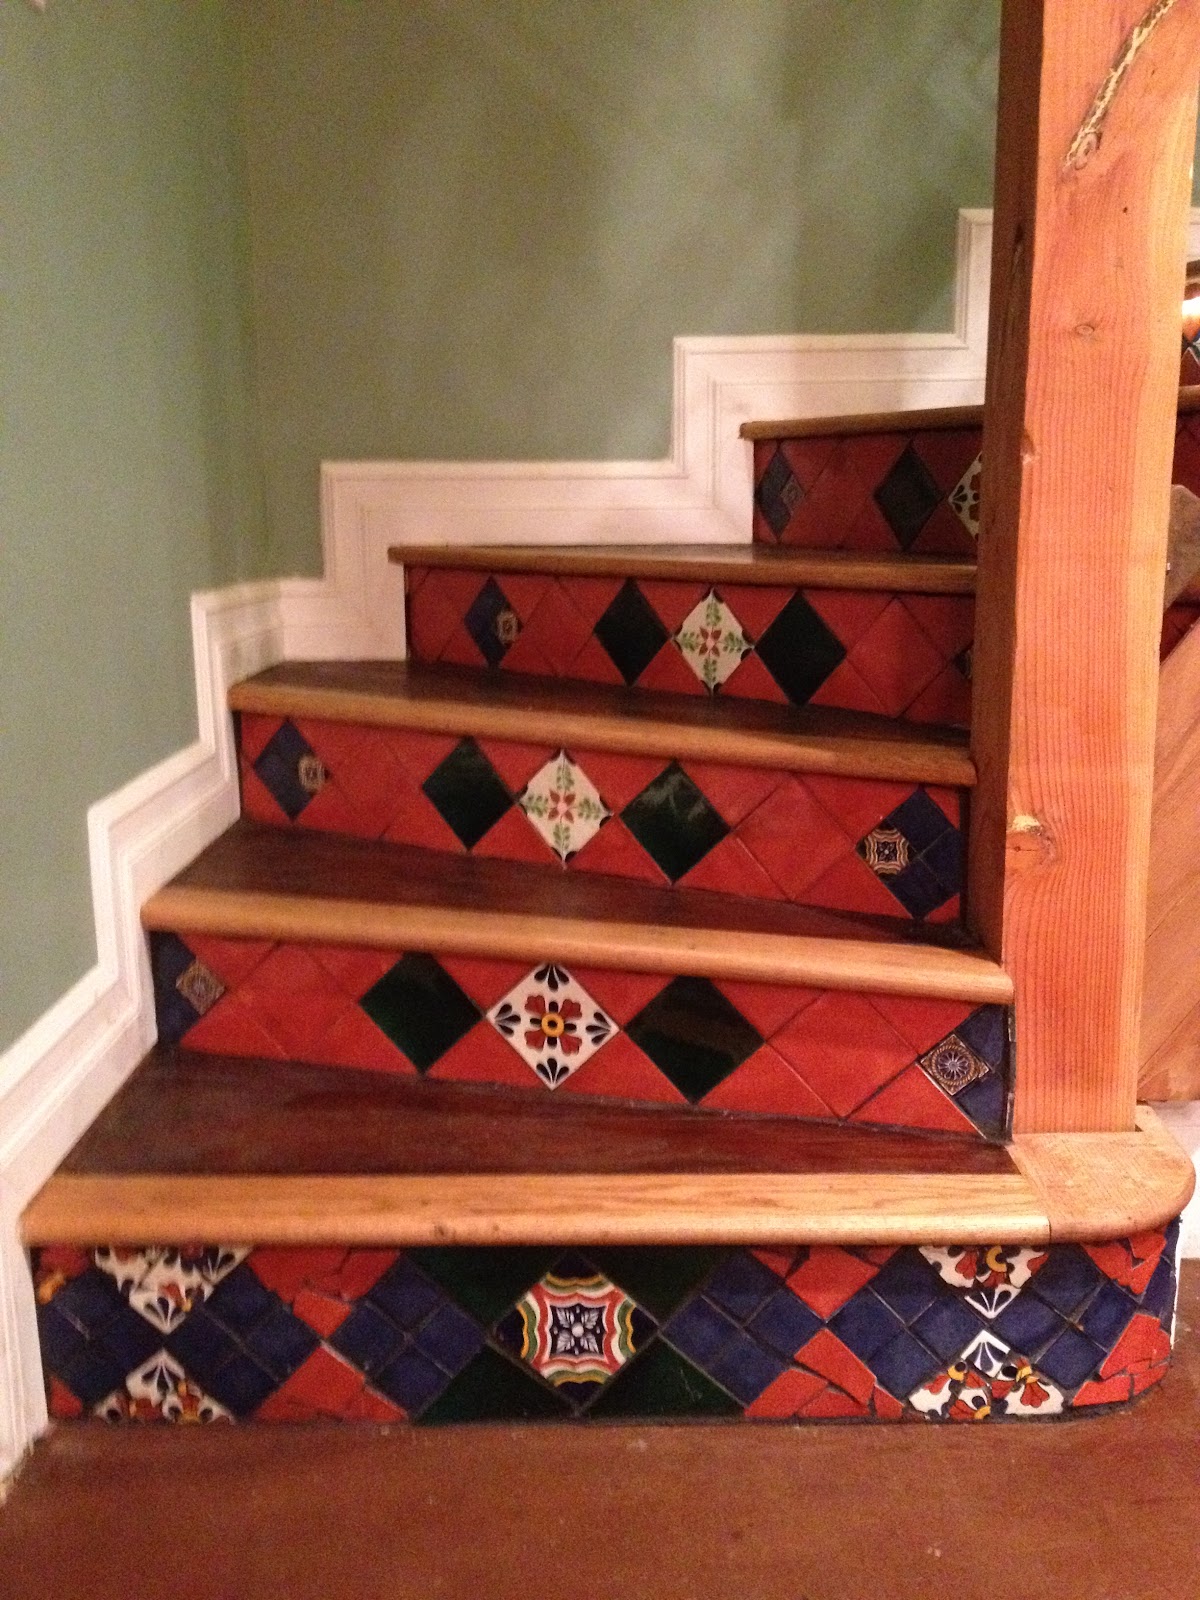
The finished stair tile risers.


From the outset, the stairs have posed an intriguing design problem. Complying with stair codes is sometime difficult in small and stout houses, such as ADUs. Portland's code requires that an ADU roof must be no taller than 18ft at its mid-point, so fitting a stair with adequate head room (6' 8") on the top stair landing, can prove to be a tricky design challenge.

There are two common design solutions. One can position a straight, simple staircase in the middle of the house, which can interfere with the spatial layout of the main floor. Or, one can position the stairs along the side of the house, and turn the top of stairs toward the center of the house before you reach the 2nd floor landing to avoid hitting your head on the ceiling.

My architect worked through many sketches before finally figuring out a functional, compliant, attractive, and space-efficient staircase design, consisting entirely of "winders". The final stair design consisted of 14 "winders": stairs which are not rectilinear, but have an angled curve as they rise upwards.

This is the architectural drawing of the winding stairs from above

The master framer would built this stairs claimed to have build over 2,000 stair cases and said that he had never built a staircase in which every step was a winder. It was a wonderous feat to watch how he constructed the framing for them.  


In addition to the unique bend of the staircase, we added a few other design elements to the staircase. When staining the stairs, we stained the nose of each tread a lighter color so that it would be easier to see each tread in lower light. Additionally, we added an LED rope light under the nose of the treads, to create an attractive perimeter/safety light solution for climbing the stairs in low light.

The LED rope lighting under each tread accents the stair below it. The nose of each tread is stained a light color in contrast to the rest of the tread, which makes each tread "pop" nicely in any kind of light, such as the low light as shown above.

Then, we added the amazing salvaged steel handrail, part of which is shown below.

Last but not least, we finished the stair risers with tiles this week. We acquired these tiles in New Mexico last year, knowing that we wanted to eventually finish the stair risers with Talavera tile. Here are some pictures of the process and finished product.


Here's a video of the finished product.


Some other ADU announcements:
  • The next ADU Class for Homeowners will be on Saturday, November 5th. This course is filling up so I'll likely offer another full day class shortly thereafter.
  • For the first time, I'm also able to offer CE credits to Oregon's real estate professionals who attend this class, thanks to the Earth Advantage Institute. The class will equip them with substantial knowledge about ADUs, enabling them to help more of residential clients identify suitable properties for ADUs, and provide information on how a residential client can proceed through the ADU financing,designing, and building process.  Please tell Portland realtor acquaintances about the class.
  • There will be a one day ADU-focused conference in Portland, Oregon, on Friday, October 26th, held in conjunction with the Portland EcoDistricts conference. I'll be helping lead one session on ADU financing, and there will many fantastic sessions there. 
  • Lastly, my ADU was featured in a great blog called Small House Bliss which I'd commend to readers who are seeking inspiration on modern, small house design. 

Thursday, August 4, 2011

Staining the Concrete Floor

I had read about staining a concrete floor, and learned that cleaning it was the important step before staining it.

Accordingly, I swept it, scraped the concrete with a knife, and then vaccuumed up the piles of dirt that were left behind from framing, drywalling and painting.

I mopped once, and the floor looked dirtier than it did before I started. After seeing how dirty the floor was, I figured that I had better do a much better job the second time. I mopped it again a second time. It looked cleaner, but there were still massive mop streaks and arcs of of dirt left behind.

Earlier that day, I had inquired about having the concrete company return to plug in the divits that are left behind by the blossoms from the cherry trees. They were able to come the next day, but said that the concrete would take a week to cure. Unfortunately, the project schedule demanded that I have the concrete stained right away---we can't install cabinets until the concrete floors are stained. And we can't have the final plumbing done until the cabinets are installed and the counter-tops put into place to hold the sink.

So, after mopping a second time, I got down on my knees and carefully scraped the floor with a razor blade, un-caking minute layers of dust and grime. Then, I mopped it again and vacuumed up the water with a shop-vac.

Then, I got on my hands and knees with a sponge and scrubbed every inch of the concrete.

In the morning, cleaned once again, and the proceeded with the staining. Here's a video the staining process.


After two layers of stain throughout the day, on the following day, I sealed the floor, and now will let it dry and cure for 72 hours. I think it's going to turn out very well.

Update: Here's a few pictures of the floor after the sealing.
Related Posts Plugin for WordPress, Blogger...